Installing and configuring EJBCA to use the eHSM Hardware Security Module
This guide will show you how to deploy the EJBCA Certification Authority on Ubuntu using the eHSM Hardware Security Module to protect the CA private keys.
The following software versions are used in this guide:
- OS: Ubuntu 18.04 LTS
- Java: OpenJDK 8
- Application Server: 14.0.1.Final
- EJBCA: 6.15.2.6
- MariaDB: 10.1
-
Clone the repository with the scripts used in this how to guide.
git clone https://github.com/ellipticSecure/ejbca-install.gitThis repository contains the 3 scripts to install and update the installation as well as properties files that can be used to customize the EJBCA service.
-
Install Wildfly
To enable rapid deployment and ease the installation, we have created a script to automate the installation. This script will install the dependencies (java), create a wildfly user and group, download, verify and install Wildfly into /opt/wildfly. It will also enable the Wildfly service to start automatically after a reboot. Feel free to customize the script as needed.
cd ejbca-install ./install_wildfly.sh -
Customize the EJBCA installation
If needed, customize the installation by editing the web.properties file. Note that the installation script for the next steps assumes that the default EJBCA ports are used. If you change the server ports, customize the install_ejbca script as well.
The properties that define the eHSM PKCS11 module in web.properties are listed below. If you are installing on a different platform these settings may be customized to reflect the correct shared object installation path.
cryptotoken.p11.lib.115.name=eHSM cryptotoken.p11.lib.115.file=/usr/lib/x86_64-linux-gnu/libehsm.so -
Install EJBCA
The install_ejbca script will download and install the dependencies (ant, mariadb, eHSM-pkcs11), add the wildfly user to the plugdev group to enable access to the eHSM device, create the default ejbca database and tables (if it does not already exist), download, verify, install and configure EJBCA.
./install_ejbca.sh -
Ensure that the eHSM is plugged in and initialized.
The EJBCA server only checks for device availability during on startup. Follow the quick start guide to initialize the eHSM. Restart the wildfly service to ensure that the eHSM is detected by EJBCA.
sudo service wildfly restart -
Install the SuperAdmin client certificate into your browser or keychain.
The exact instructions will depend on the browser and OS you use when administrating the EJBCA server. For Chrome on Ubuntu, navigate to Settings -> Advanced-> Privacy and security -> Manage certificates (or use the search bar in Chrome settings to search for “manage certificates”)

On the “Your certificates” tab, click “Import” to import p12/superadmin.p12 from the location where you are executing the installation scripts. The default certificate password is “ejbca”.
-
Navigate to https://localhost:8443/ejbca/adminweb/
You will be prompted with a security warning, continue and then select the SuperAdmin certificate when prompted.
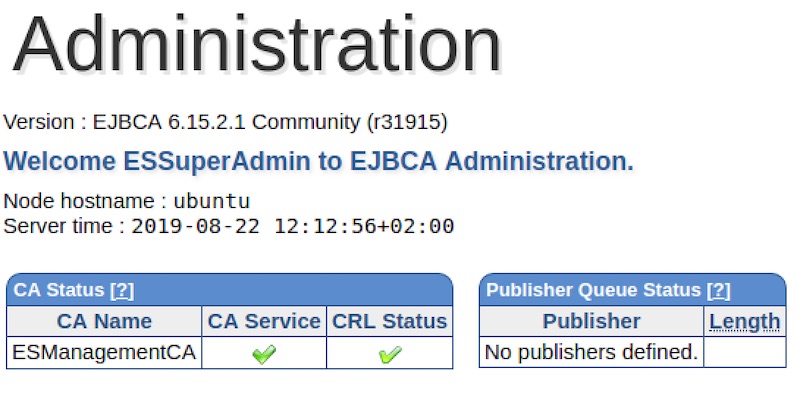
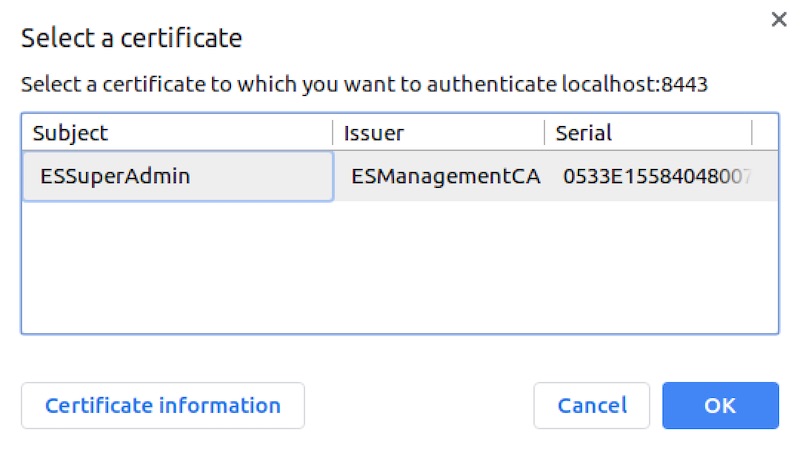 If everything went according to plan you should now see the EJBCA admin interface.
-
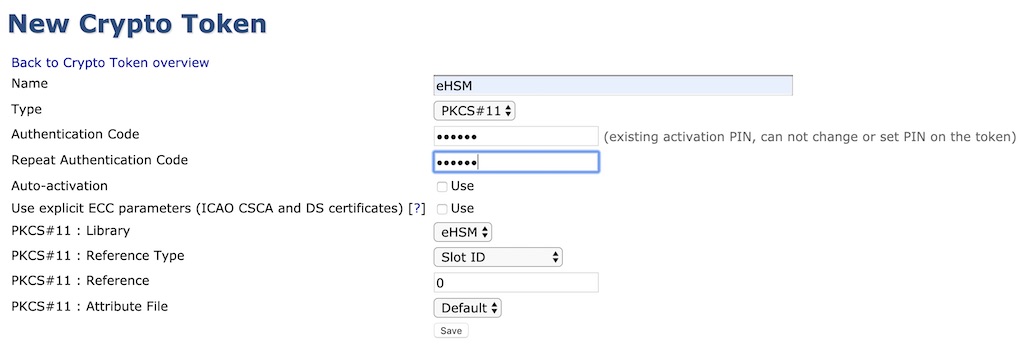
In the CA Functions menu, select “Crypto Tokens”
Click “Create new…” to create a new token. Select PKCS#11 for “Type” and enter the eHSM User PIN in the Authentication field. Click “Save” when done.
-
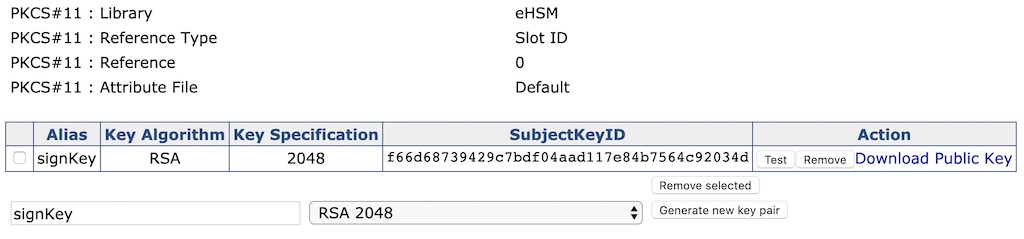
Generate a new key pair on the eHSM Crypto Token (an RSA key pair will take a few seconds) or use an existing key pair for the CA.
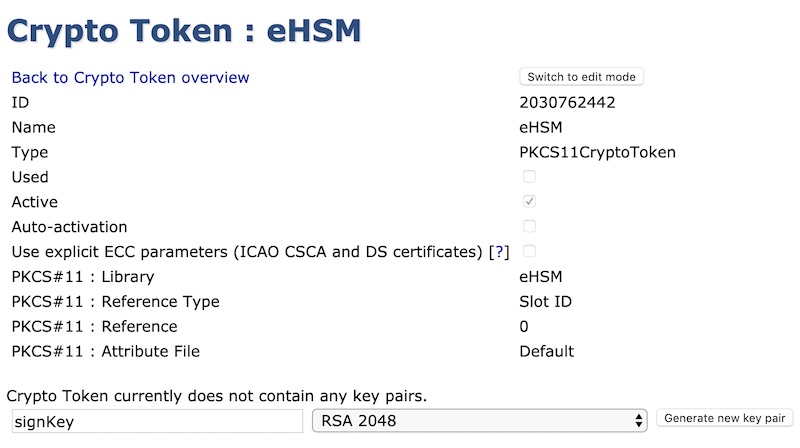
After the key pair has been created, the key will be listed as follows:
-
In the CA Functions menu, select “Certificate Authorities”
Enter a new CA name under “Add CA” and click “Create…”

In the CA Administration form, select eHSM under “Crypto Token”. Fill in the rest of the form and click “Create”.
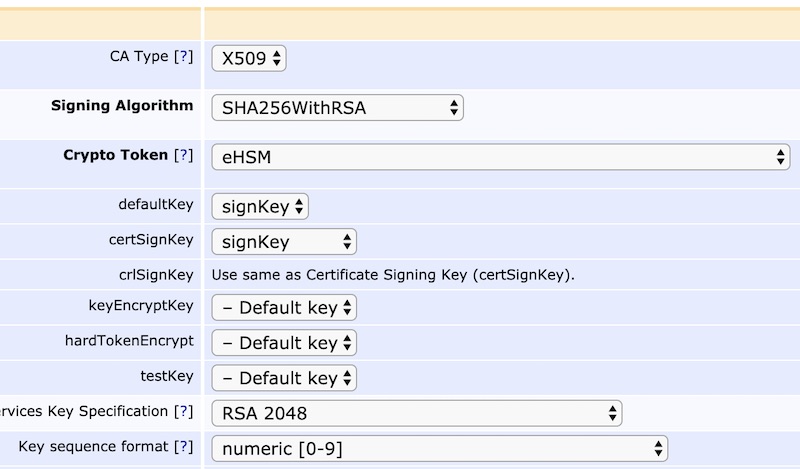
You have now created a CA backed by a key in the eHSM hardware security module.
Questions or suggestions? Please contact us using the Support widget or submit a ticket.