Using the MIRkey or eHSM for 2FA authentication
One of the biggest challenges for IT managers to secure their networks is user authentication. Make your password policy too strict and users will start to save their passwords on insecure media and forcing password rotation too often can cause frustration and increase support queries.
Even if you have the strictest password policies, eventually someone will succumb to a phishing attack and expose your network to ransomware or something worse.
It’s worth while remembering that you are not protecting a network or data - you are protecting the trust clients have in your company. If customer data is lost, not only will the company be facing GDPR repercussions and fines, ultimately customers will lose trust in your company.
Adding a second factor of authentication or using multiple factors of authentication is one of the best ways to stop phishing attacks dead in their tracks.
The attacker may obtain the password, but without the second factor he will not be able to use it.
Software based apps are often hacked - see our recent blog post. Compared to using software based authenticator apps on mobile phones, using an HSM like eHSM or MIRkey for the second factor can be regarded as strong authentication.
To showcase the versatility of the MIRkey and eHSM as a general purpose HSM, this how-to guide will show you how to use it as a 2FA device.
Prerequisites:
Install the eHSM Manager - get the latest version for your platform from the downloads page.
Note: In this how-to we use a Google account to illustrate the concept, but many other service providers (Amazon, Github, Gitlab, etc.) use 2FA and this is compatible with the TOTP implementation on the eHSM Manager.
-
Open your Google account, navigate to the “Security” tab and click on 2-Step Verification.
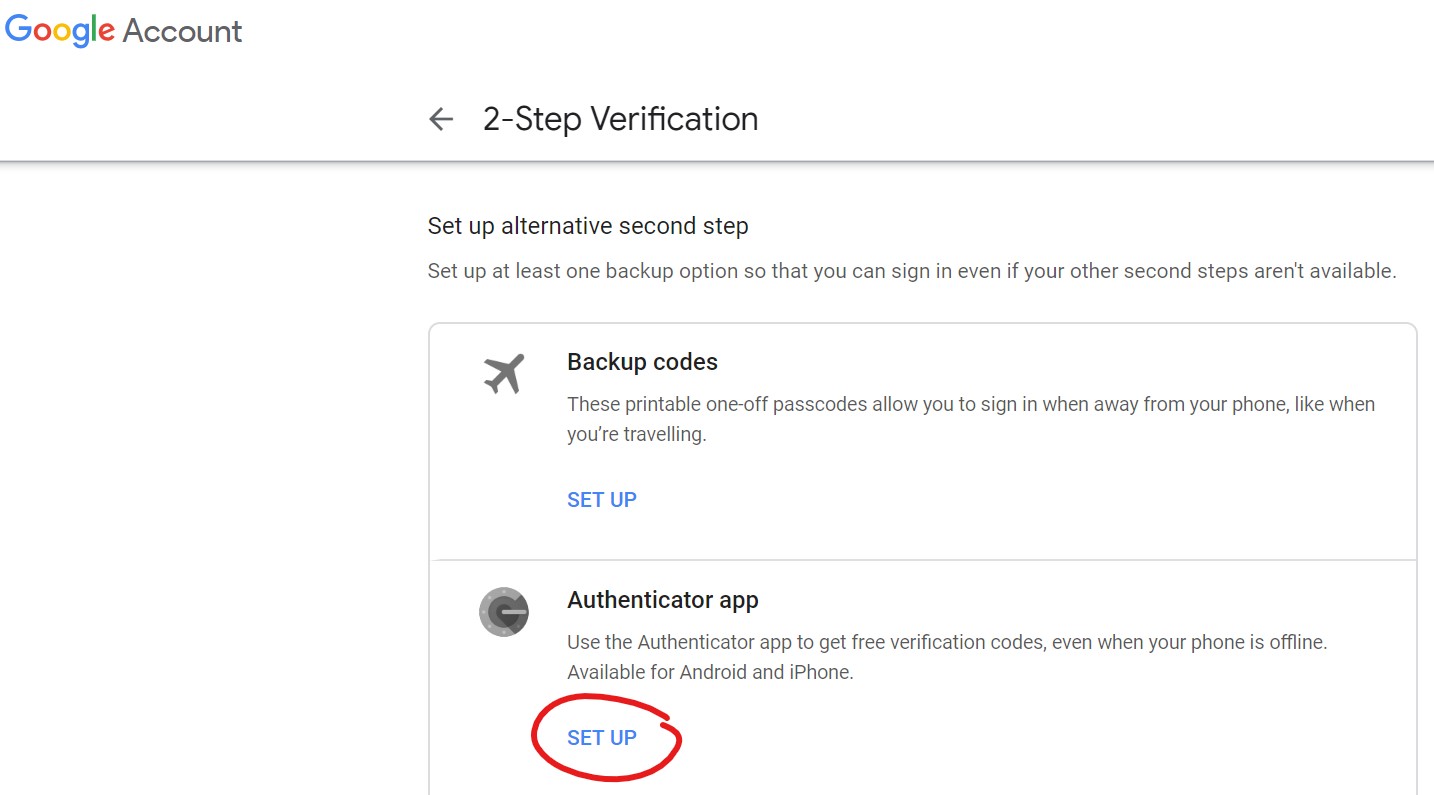
Click on “Set Up” in the Authenticator app section
-
A dialog that looks like the following will open:
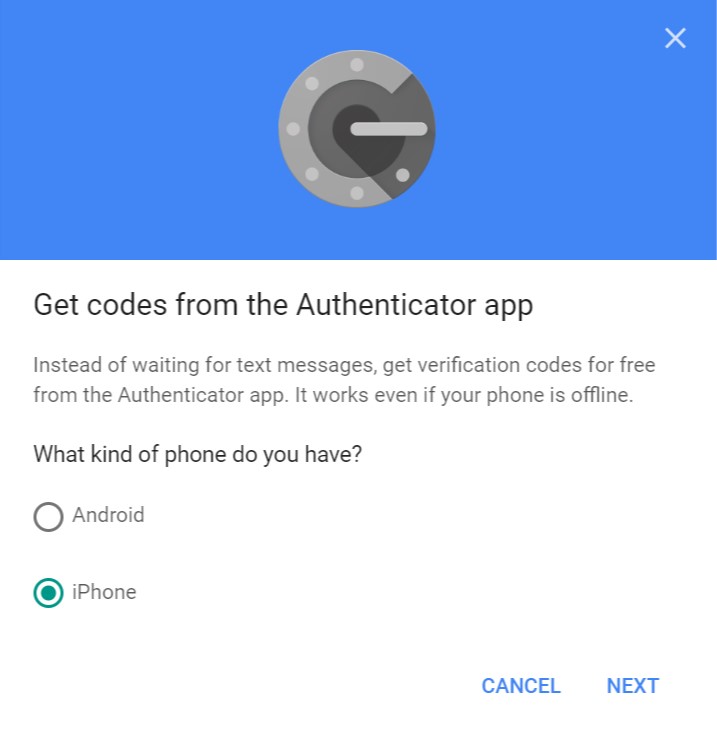
Select any type of “Phone” and Click “Next”. You will not be using the “Authenticator app” at all.
-
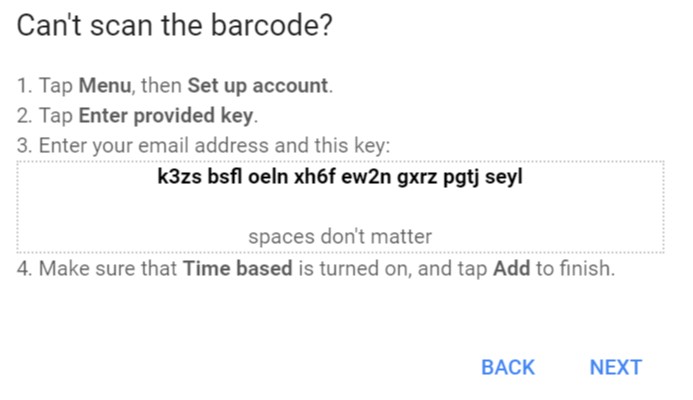
On the next page with the QR code, click “Can’t scan it?”
You will then be shown the 2FA details.
-
Open the eHSM Manager and select the “Enroll 2FA…” tool.
This step imports the key from the service provider into the HSM secure storage.
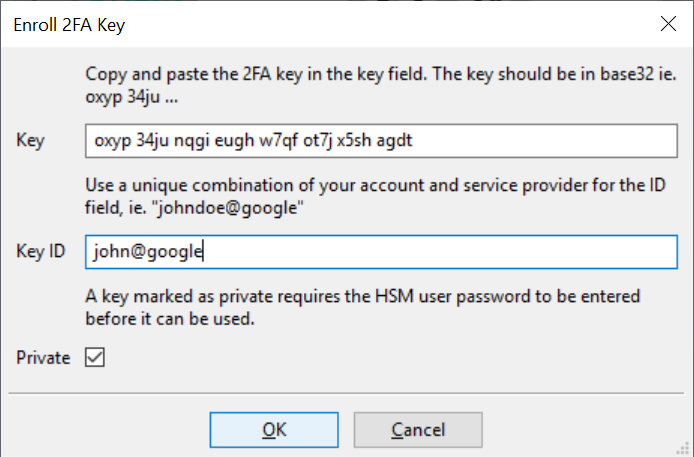
Copy the key shown in step 3 into the key field and provide a unique key id that will help you to match the key with the service provider and click OK.
-
Click on the “2FA” button in the eHSM Manager main screen
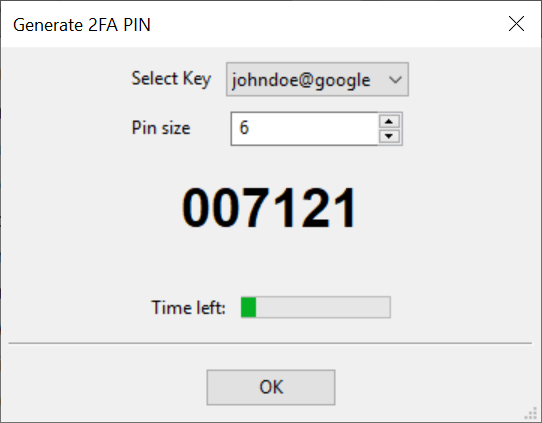
-
Copy the eHSM Manager generated OTP PIN and paste it into the “code” field after clicking “Next” on the enrollment page from step 3.
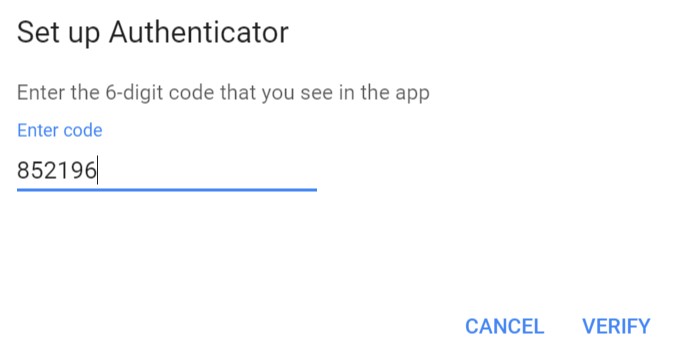
Click “Verify”
Your account is now 2FA enabled. Whenever a 2FA code is required by your authentication provider, just copy the code generated by the eHSM Manager.
- This is even quicker than typing a code shown on your mobile phone and it is more secure as well.