Configuring OpenVPN to work with your eHSM Hardware Security Module
Many companies allow VPN connections into their network to enable employees to work remotely. Usually, keys and certificates are generated and then provided (or mailed!) to the VPN user.
Once the key is on the remote worker’s laptop, who knows what can happen with it. Often times the keys are not even password protected allowing a hacker easy access to your network without your knowledge.
Follow these instructions to start securing access to your network.
Note: you can also re-use an existing HSM key or import a key from a PEM file. The important part is taking note of the key ID which will be used by OpenVPN to match the key with the VPN certificate. If you already have a certificate and private key lying around on your file system, you can import the key (Tools -> “Import a private key…”) and then skip to step 3. We recommend generating a key on the HSM rather than importing it because that is the only way to be certain that the key has not been compromised.
Download the eHSM Manager for your platform here.
-
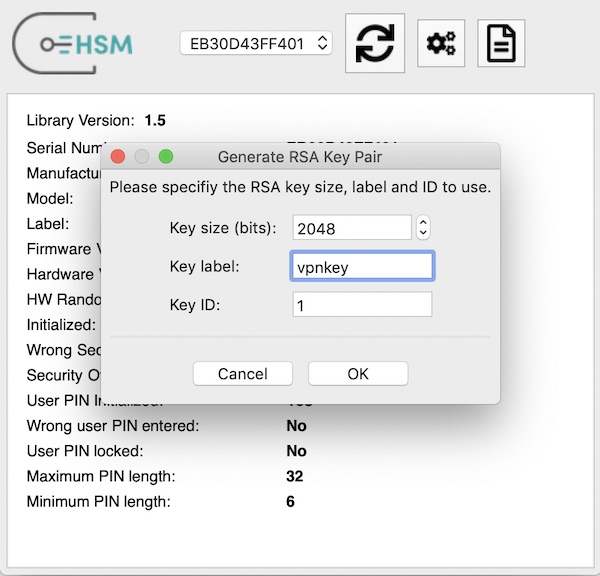
From the Tools menu, select “Generate RSA Key Pair…”:
Fill in the required details and click “OK”. Take note of the key ID and use the same key ID during the configuration.

Depending on the key size, it will take a few seconds to securely generate the key.
-
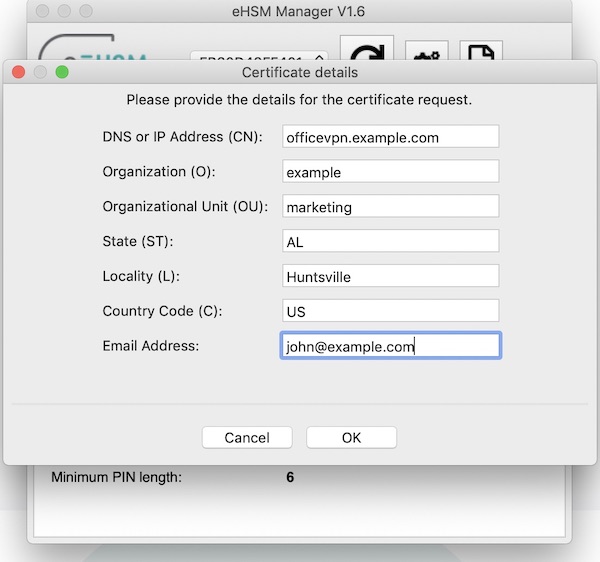
Generate a certificate signing request (CSR) that you can send to your VPN administrator for signing.

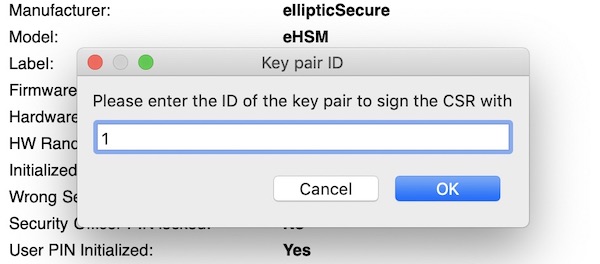
Be sure to use the same key ID that you used to generate the key above.

-
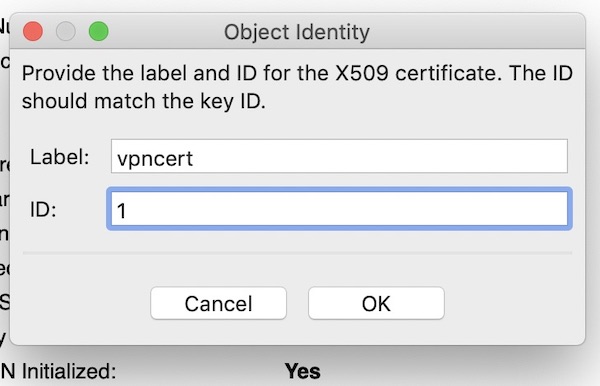
Once you have the VPN certificate, import it into the HSM.
Once again, make sure to use the same key ID.

-
Configure OpenVPN to use the certificate and key.
Note: you will need to adjust the paths for your platform.
First, let OpenVPN list the available certificates:
/usr/local/sbin/openvpn --show-pkcs11-ids /usr/local/lib/libehsm.dylibOpenVPN will output something like this:
 The following objects are available for use.
 Each object shown below may be used as parameter to
 --pkcs11-id option please remember to use single quote mark.

 Certificate
        DN:             C=US, ST=AL, L=Huntsville, O=example, CN=officevpn.example.com, emailAddress=john@example.com
        Serial:         05
        Serialized id:  ellipticSecure/eHSM\x20USB/EB30D43FF401/eHSM1/68657876706E
Copy the “Serialized id:” field and add the following lines to your openvpn config:
 pkcs11-providers /usr/local/lib/libehsm.dylib
 pkcs11-id 'ellipticSecure/eHSM\x20USB/EB30D43FF401/eHSM1/68657876706E'
That’s all folks! Now just open your VPN connection as usual. If you are starting the VPN from the command line, OpenVPN will prompt you for the HSM password:
sudo /usr/local/sbin/openvpn --config example.ovpn
...
Mon Jan 21 14:00:27 2019 VERIFY OK: depth=1, C=US, ST=AL, L=Huntsville, O=example, CN=officevpn.example.com, emailAddress=john@example.com
Mon Jan 21 14:00:27 2019 VERIFY OK: depth=0, C=US, ST=AL, L=Huntsville, O=example, CN=vpnadmin, emailAddress=admin@example.com
Enter eHSM1 token Password:
...